They are rage, brutal, without mercy. But you. You will be worse. Rip and tear until it’s done.
— Doom Seraphim.
Gym Note Book on Google Play: https://play.google.com/store/apps/details?id=com.nick.wood.gym_note_book
Err wut is dis?
Are you sick to death of taking a notebook to the gym to track your weight lifting progress? Do you hate the fact that every other gym app tries to tell you what to do in the gym instead of just letting you record what you lift? Then the Gym Notebook is for you!
Here at Gym Notebook we won’t tell you what to do. Your a big lad/lass now, you know what your doing. All you have to do is add an exercise and start tracking your progress. Below is a full tutorial on how to use it.
Starting the app.
Well this it’s easy. Obviously click on the app icon. This will take you to the starting screen.
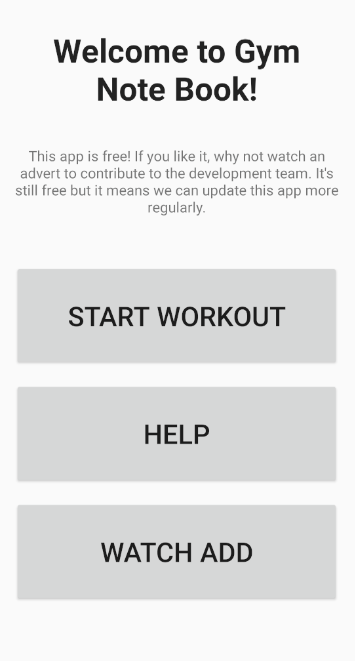
From here you can choose to start the workout, find help on this app with some handy links, or watch an add to support the developers.
Start Workout
After pressing start workout, you will be relocated to the main exercise list page where you will be able to select an exercise you’ve previously created, or search the list via clicking on one of the tags at the top. More on these late.
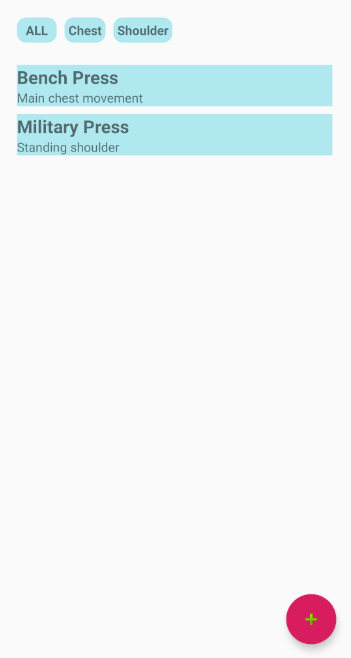
Now yours will looks pretty blank at this point. Just like a freshly opened notebook. To add an exercise, simply click the floating red button in the bottom right hand corner. This takes you to the exercise creation page.
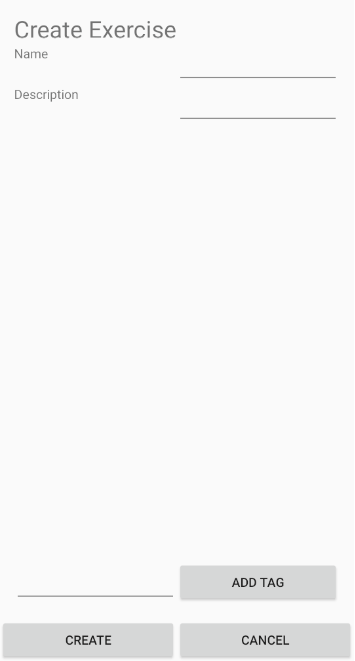
Here you can give the exercise a name, like bench press (obviously the first one you will want to add). Then you can give it a simple description. Here I like to put notes about form. Or maybe you can write a goal here or a quote to keep you motivated like:
F**k stress, Bench press.
Random gym t-shirt off the internet
Then you can assign tags to the exercise. The tag can be anything you like, but some examples are as follows:
- Muscle group: the name (or names) of the muscle group you are targeting. For bench press you could add chest and front delts.
- The workout this fits into: if you are doing a push pull legs, upper body or a bro split, you may wish to put information about that here. For instance, bench press could have the tags push, upper or Monday.
When are a finished editing you new exercise, just press create. If you want to cancel the creation, just the your android back button.
Either way you will be taken back to the home screen, which now looks a little less empty. The main list now contains you new exercise and A list at the top of the screen shows the tags you have entered. But clicking on a tag you will filter which exercises show up in the screen. If you wish to see them all, just press all.
Now for the gym!
When you’ve just finished a set at the gym and want to record it, press the exercise in the list. You will be taken to the exercise home page.
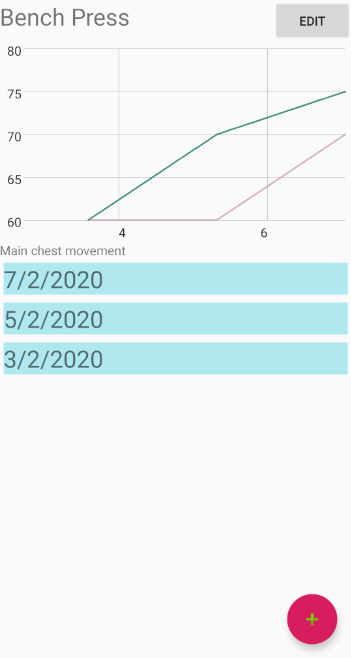
At the top is a graph. This will show weights and dates of your sessions. At the moment it will be empty but after a couple of days usage you will see a line representing the weight you lifted compared to the date. The number at the bottom is the day of the month.
To add a session, press add workout. This will usher you onto the workout creation page:
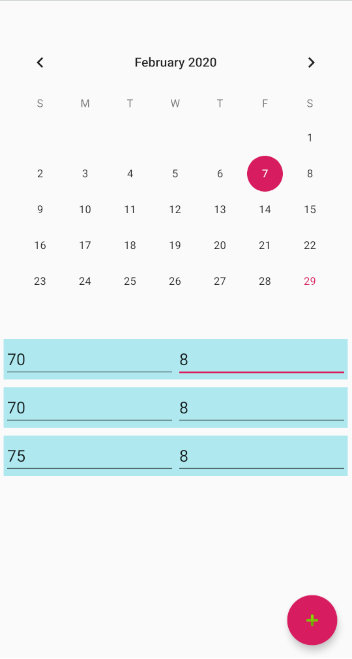
This contains a list of sets, where you can set a weight and a rep number. Press add to add a new rep. You can also set the date, but my default it will be set to today’s date. Pressing the back button will take you back to the exercise home page, saving your workout.
And that’s pretty much it. Simple! So bin the notebook (or recycle I guess given how angry Gretta Thunberg is), uninstall all the other gym apps that make you do things like not do chest every day, and start making them gains!
I’m constantly updating the app, so if you don’t like something, or think something would make it better, feel free to leave a comment and I’ll try and get round to it.
Thanks!
